Learning some new tools, especially for an app called Nearpod were such an improbable thing that I’ve gotten so far in this semester. When my partner and I made this tool, we also presented it in front of our class and we got some great critiques from our lecturer. In my personal opinion, I got some points that how to be a teacher making the students won’t forget about materials that they’ve been learning and not to come into the class with empty brain and the one thing that I clearly remember is you have to trigger your students' memory and all you need is to make quizzes. The second one is about giving an explanation. As a good teacher, you have to give brief yet clear the details of your material and make sure all your students are understood. The target of my learning context was 1st Junior High School students because it was all about comparison. As I remembered, I learned about it around 6th Primary School but this is more complex and detail. What I was trying to give to my students were increasing their skill to say it fluently and can differentiate which is the correct one because in what I saw, students are even still mispronounced.
The next one is I will explain how to make your own Nearpod so that you can make it for your own soon.
1. Open the app by clicking this and you'll go straight to the main page and it will look like the picture below.
The next one is I will explain how to make your own Nearpod so that you can make it for your own soon.
1. Open the app by clicking this and you'll go straight to the main page and it will look like the picture below.

2. And all you have to do is sign yourself up and I recommend you to use via Google because it's much easier and no need to fill any identity.

3. If you already log in, you'll get in into the lesson and you're ready to make your own tools!

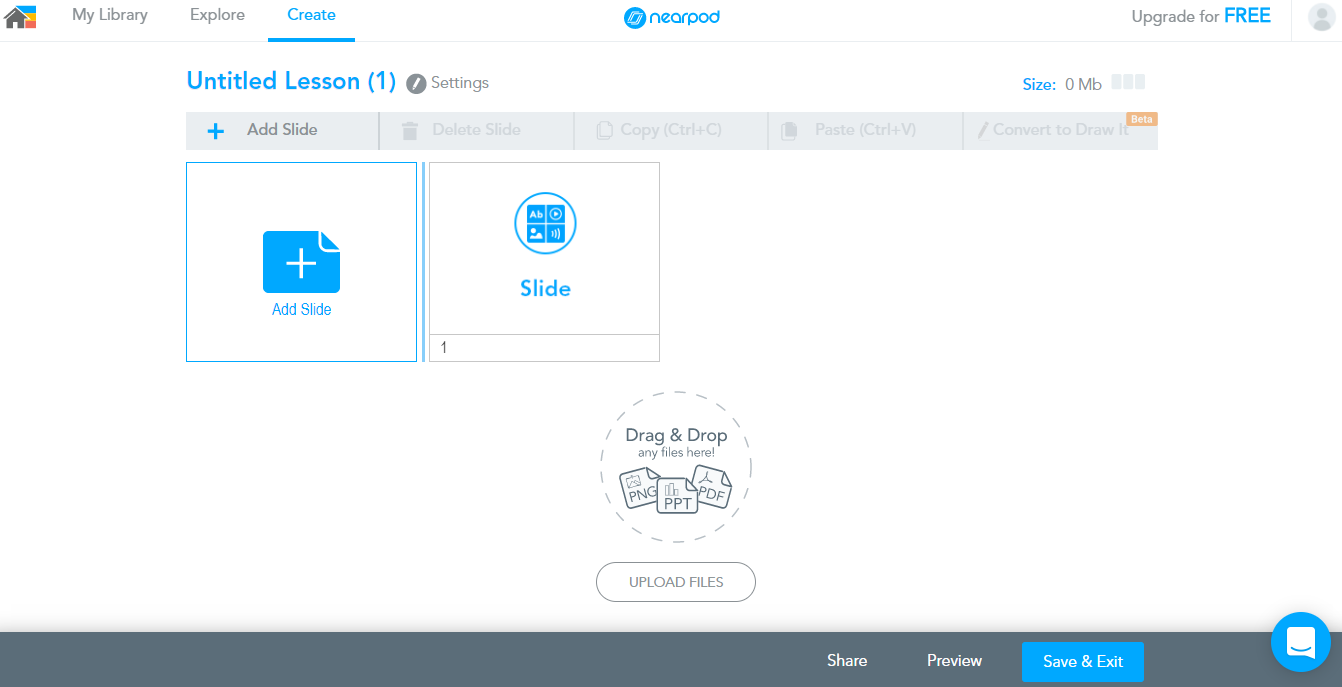
4. Soon after you clicked the"add lesson", you'll see these 3 (three) boxes) as the picture below.

5. At the first box, which is on the left side, it's written "add content". That box consist of many parts and for mine, I use slides because that's the simplest and most effective ones. You may use and look for other parts by clicking the arrow on the right side.

For the example I clicked slides part and it will turn out like this picture You can add pictures, photos, charts etc. as same as when you make a presentation by Power Point.

6. Back to the 3 boxes previously, for the web content, you can use it if you want to take some resources directly from the internet.
7. The last box, the "add activity" one,I totally suggested you to use that because you can make quizzes as much as you want such as fill in the blank, drawing and also you can make a poll for a survey how may students are participated. Same like I typed before, you can find other interesting parts by clicking the arrow on the right side.

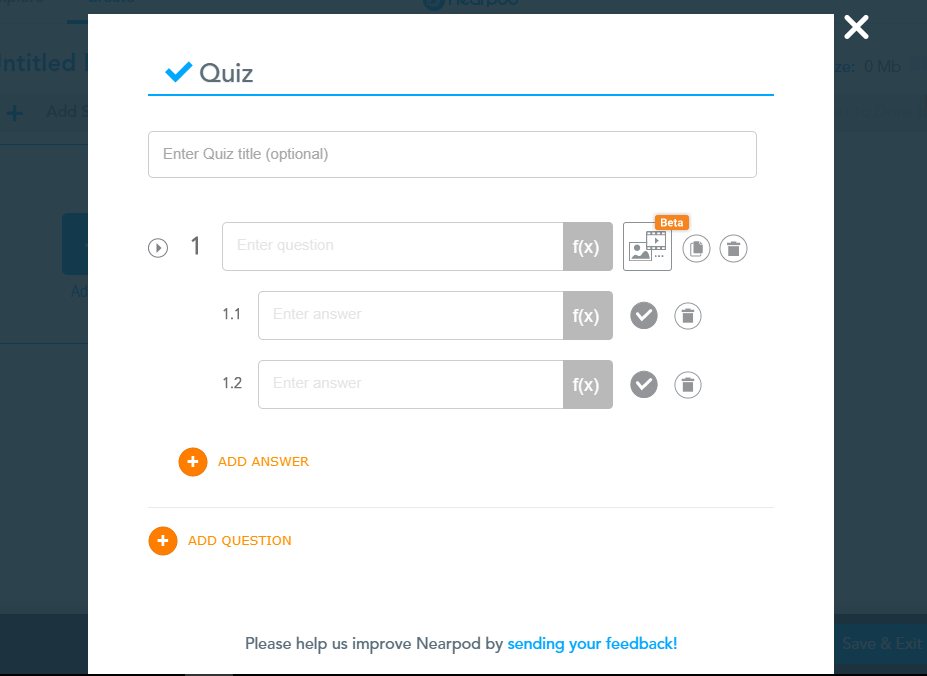
Let me continuing the steps because these are really interesting to explain. As an example, I want to have a quiz trough my lesson and this page below will appear after you click the quiz part. You may put as much number as you want as long it's related to the material.
8. After finishing the lesson, you'll see this picture and your lesson is ready to present trough your students!
9. Before you publish it, just fill a couple little things as your description and voila! Your Nearpod is ready.

10. You can see all your lesson in your webpage and you can make another one on a particular days.

11. For all readers, please check this website to improve your skills and doing more exercises.

That's all steps that you need to make the Nearpod tools. You can open my lesson here and enjoy it, good people!
Very good and clear explanation! I like the way you explain the steps.
ReplyDeleteJust 1 thing to consider next time is about the grammar, especially in active and passive voice.
The rest is already awesome.
God bless