Making a lesson plan for the first time wasn't easy at all. First thing first I have to look for a material that suitable for my students and my target is college students. Lesson plans that I've made are about making a short video about themselves. I got the inspiration from Film Festivals in London on last October and that was incredible. Also, I got some new experiences from my lecturer how easy is making a video by Adobe Spark via online. Inside that lesson plan, there are some steps that I've made, how I introduce the app to my student by giving them some online quizzes and later on I will explain the details when they are going to make their videos.
That's a brief explanation of my first lesson plan so far. Gracias!
You can check out my lesson plan by clicking this link below.
https://drive.google.com/file/d/17-sQnfWOBcUluX2bshNdN1G8lws5af0u/view?usp=sharing
Wednesday, December 20, 2017
Sunday, December 10, 2017
Collaborative Writing Project

Trying Google Drive which ain't no my first time, I was relishing it because I did it with my friends without face-to-face. That's the purpose of using Gdrive as Collaborative Writing Project. Briefly, my duty on my assignment was as the Outlining Facilitator which is structuring an essay into a coherent one. As the rules say, I already made exactly 4 sentences summary of "When Tablet Turning Teacher" essay also with my own opinion about that title. Being an outlining facilitator, I had an introduction, 3 paragraphs, and conclusions. Not forget to tell my other friends to re-read their own ideas and soon after that, I elicited their ideas into a properly essay also with the PAC method. Purpose-Audience-Content. Last but not least action, checking grammatically is a must-to-do thing that should be done in the end before submitting the task.
Like I said before, it ain't my first time having Gdrive as my discussion with friends even lecturer. Even I already tried it for couple times, I still found some difficulties that happened every time I operated it, such as the discussion one. It's not easy to gather all the participants into one essay and you had to make plenty arguments by typing what's on your mind. Sometimes you want to interrupt immediately because you have something much better but your typing skill isn't good enough. Occasionally, what you've written isn't as same as you've been thinking a.k.a the way you deliver your idea isn't precisely same like in your head. Even the difficulties such I said before, Collaborative Writing Project is the best way to work an essay together rather than sending email one by one which is wasting your precious time.

If I'm a teacher, I'd like to let my students use Gdrive as their working essay and they can still have some arguments in a comment section, but I allow them having face-to-face arguments to make sure that everything stays on the line. Me, as the teacher, I just supervise them from their discussion forum and unquestionably let them ask me for opinions either on or offline. That's what I'm gonna do soon if I'm a teacher. You are totally granting all of you, my readers to see my friends and my essay using Gdrive as our Collaborative Writing Project right underneath this sentence. Enjoy reading and keep learning ;)
Thursday, December 7, 2017
Blendspace as My New Powerpoint
Trying a new app for learning activity is such a great experience to me because I get plenty of knowledge that really useful for my future. Blendspace is one of the tools that has been my favorite because there are plenty of equipment that I can use easily. As I observed, this app is available for students wanting to improves their skills such as taking notes as they're listening to the video, creativeness, and ability to find something new more on the internet.

My Blendspace is about the 9/11 attack and yes it sounds do historical because I want to learn something new as a History Teacher. You may check my own app by clicking this. Trust me you will be interested in my topic especially for my Junior High School students who are able to learn more about the biggest attack in a history. There's another reason why I use Blendspace as my learning activity because I want to show to my students clearly by showing links, pictures, and explanations just with some clicks. It contains 9 slides such as youtube video, brief explanations about the topic and also some links to strength the material. For the duration, it only takes 20 minutes and absolutely that's so much more efficient rather than write some notes and look at a presentation.

Even I like this app, also there is a drawback that I'd like to mention is when I tried to drag some files, there was some struggling because the file went out of the box. And yes, I think that's the only tiny thing that I've found so far. As a student, I really enjoy making this app and I'm pretty sure if I have students, they'll enjoy it as much as I do. Last but not least, please check app below this one and you'll understand more about WTC Accident. Enjoy!
Wednesday, December 6, 2017
Nearpod as a Mobile Learning
Learning some new tools, especially for an app called Nearpod were such an improbable thing that I’ve gotten so far in this semester. When my partner and I made this tool, we also presented it in front of our class and we got some great critiques from our lecturer. In my personal opinion, I got some points that how to be a teacher making the students won’t forget about materials that they’ve been learning and not to come into the class with empty brain and the one thing that I clearly remember is you have to trigger your students' memory and all you need is to make quizzes. The second one is about giving an explanation. As a good teacher, you have to give brief yet clear the details of your material and make sure all your students are understood. The target of my learning context was 1st Junior High School students because it was all about comparison. As I remembered, I learned about it around 6th Primary School but this is more complex and detail. What I was trying to give to my students were increasing their skill to say it fluently and can differentiate which is the correct one because in what I saw, students are even still mispronounced.
The next one is I will explain how to make your own Nearpod so that you can make it for your own soon.
1. Open the app by clicking this and you'll go straight to the main page and it will look like the picture below.
The next one is I will explain how to make your own Nearpod so that you can make it for your own soon.
1. Open the app by clicking this and you'll go straight to the main page and it will look like the picture below.

2. And all you have to do is sign yourself up and I recommend you to use via Google because it's much easier and no need to fill any identity.

3. If you already log in, you'll get in into the lesson and you're ready to make your own tools!

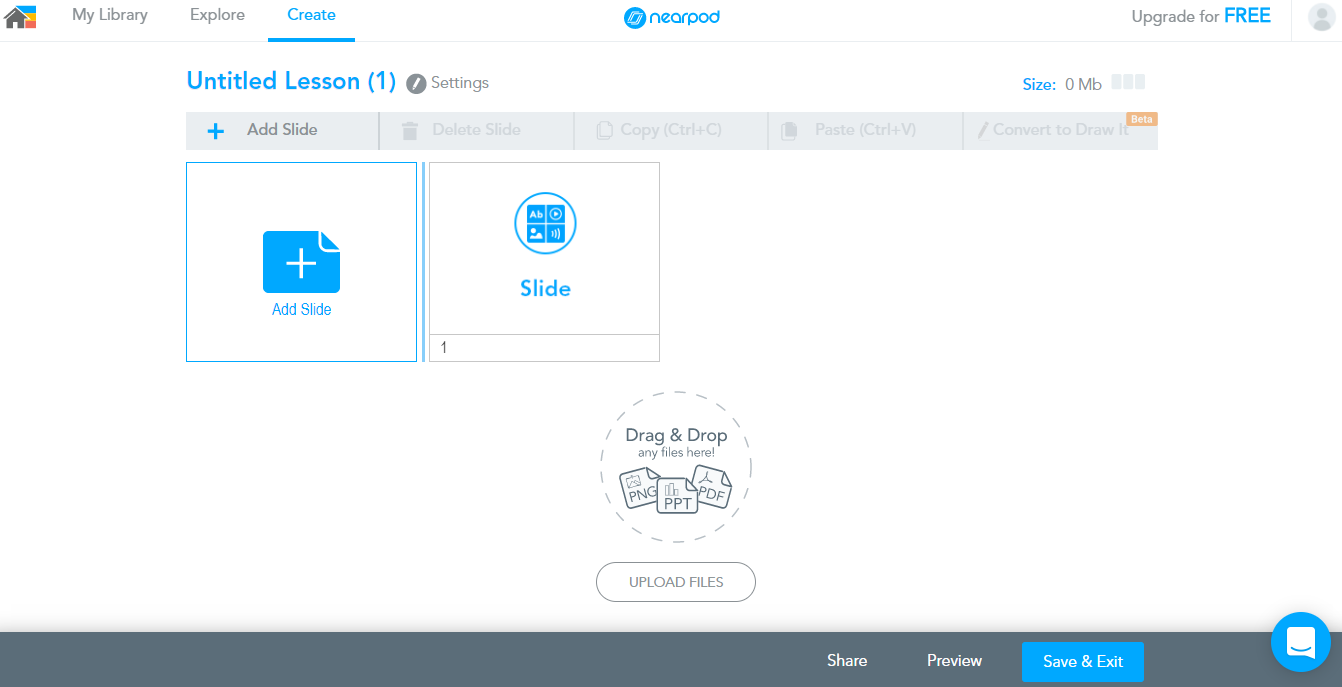
4. Soon after you clicked the"add lesson", you'll see these 3 (three) boxes) as the picture below.

5. At the first box, which is on the left side, it's written "add content". That box consist of many parts and for mine, I use slides because that's the simplest and most effective ones. You may use and look for other parts by clicking the arrow on the right side.

For the example I clicked slides part and it will turn out like this picture You can add pictures, photos, charts etc. as same as when you make a presentation by Power Point.

6. Back to the 3 boxes previously, for the web content, you can use it if you want to take some resources directly from the internet.
7. The last box, the "add activity" one,I totally suggested you to use that because you can make quizzes as much as you want such as fill in the blank, drawing and also you can make a poll for a survey how may students are participated. Same like I typed before, you can find other interesting parts by clicking the arrow on the right side.

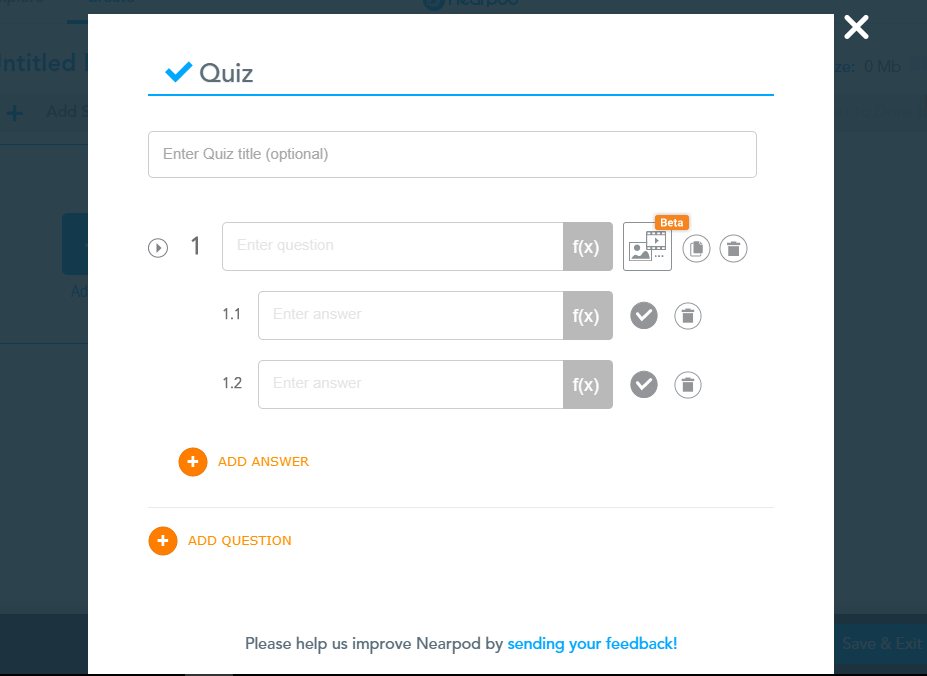
Let me continuing the steps because these are really interesting to explain. As an example, I want to have a quiz trough my lesson and this page below will appear after you click the quiz part. You may put as much number as you want as long it's related to the material.
8. After finishing the lesson, you'll see this picture and your lesson is ready to present trough your students!
9. Before you publish it, just fill a couple little things as your description and voila! Your Nearpod is ready.

10. You can see all your lesson in your webpage and you can make another one on a particular days.

11. For all readers, please check this website to improve your skills and doing more exercises.

That's all steps that you need to make the Nearpod tools. You can open my lesson here and enjoy it, good people!
Monday, December 4, 2017
Flipped Class Video Activity

What I'm trying to say here is the flipped class is a totally outstanding system that also makes students think more about developing technology in this era. We also know that children these days are allowed to use a gadget for fun. If for gaming are allowed, how about their education? I bet their parents are no doubt to support and keep supervising their children's activity on a gadget. If I am a teacher, I will use the flipped class system so that I can monitor my students' development. On the other hand, I have to adapt to the class also the institution condition. If it's possible to use the system, why not? Because there are many advantages using the flipped class such as either students or teacher are able to use it anywhere and anytime. That's the first. The second one is paperless. We know that the biggest unsolved crisis in this world is about global warming. The less paper we use, the more trees that we can save.

When I made my TED-Ed (https://ed.ted.com/lessons) by creating a lesson, the first thing that came out of my mind was incredible! All I had to do is just looking for a video from youtube (youtube.com), copy the link and paste into the tools. The next step is making some questions and voila! Your video activity for the flipped class is ready to use! Even I already mentioned the advantages, it doesn't mean the tool doesn't have some drawbacks. Actually, I only found 1 as my consideration using video activity to apply at class and the reason is we need well-prepared for the equipment such as a laptop, wi-fi, sockets etc and not all school/university provide those things.
You can look out my flipped class video activity about visual aids by clicking this and my video presented to a senior high school student also college one. Enjoy and keep practicing!7
Subscribe to:
Comments (Atom)
-
 Using a TED-Ed as my reference to make some exercises is such a new thing to me yet very interesting because this is the first time I knew...
 -
 Trying Google Drive which ain't no my first time, I was relishing it because I did it with my friends without face-to-face. That...